PRO-TALK
The world, in your hands
Using your Pro-Talk account
Signing into your account
- Sign up for a free account. Upon successful registration, you will receive an email containing your account username and password.
- Click here to log into your account.
- Enter your account username and password and then click the green "Login" button.
- If you have forgotten your username and/or password, you can retrieve this information by selecting the "Forgotten Password" link at the bottom of the page. You will be asked for your e-mail address to which the information will be sent. The e-mail address must match the one you provided when you signed up for your account. You will then receive your login details by e-mail within the next 10 minutes. Make sure to check your e-mail "Junk" folder as some mail clients may send the e-mails there.

Re-Setting your Password
- The first thing we recommend you do is to re-set your account password. This is the password which you just entered to log into your account.
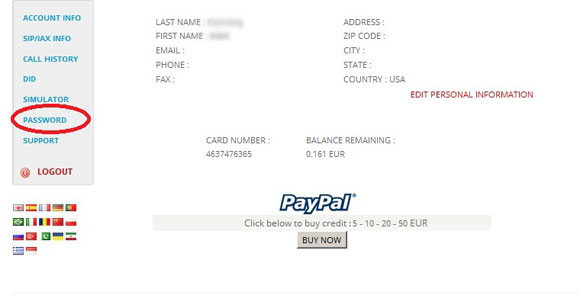
- To change the password, select "Password" from the left hand menu after logging into your account.
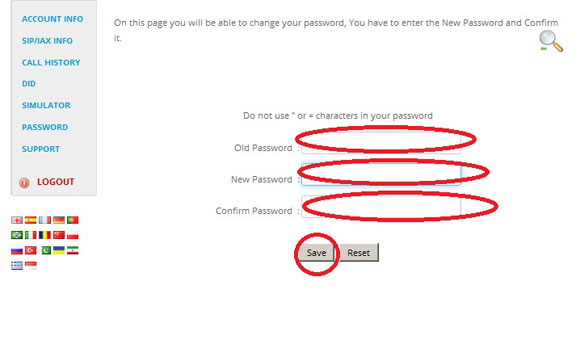
- On the following page you will be asked for your current password, and then a new password to which you wish to change it. The new password will need to be entered twice. Please make sure to change your password to something memorable for you, but which cannot be guessed by anyone else. Keep your password secure at all times.
- Select "Save" at the bottom of the page. And that's it. Your password is changed! You will need to enter the new password every time you wish to log into your account in future. Please note that you cannot change the username of your account.
Topping Up
- Unless we have applied a special offer, your account will start with a "0" balance. If you have purchased a phone number from us then you will still be able to receive calls on that number despite the "0" balance, but you will not be able to forward those calls to a landline or mobile (except with an Internet app or VOIP phone - click here for more information about receiving calls). However, you will not be able to make any calls. until you have topped up your account.
- You can top up using a Paypal account or any debit or credit card. All top-ups are carried out using Paypal's secure servers - even if you are not using a Paypal account. Simply follow these steps to top up you account.
- Log into your account.
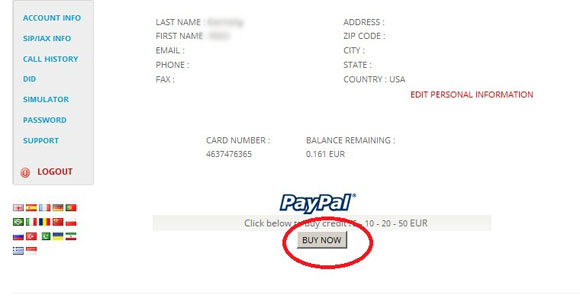
- Select the "Pay Now" button beneath the Paypal logo towards the bottom of the page.
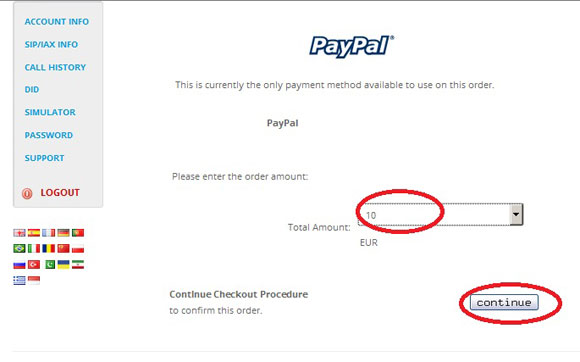
- From the drop-down list, select the amount by which you wish to top up. You can top up by one of the following amounts: €5, €10, €20 or €50. Click "Continue" once you are happy with your selection.
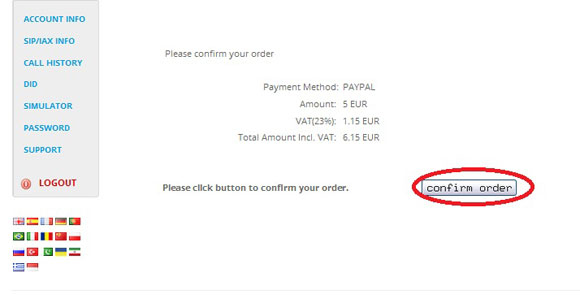
- The following page shows you a summary of your top-up, including VAT. Click "Confirm order" if you are happy with this. If you are liable to pay VAT then this will be added to the amount of your top-up. For billing convenience, we charge VAT at the point of top-up so that it does not need to be charged on our products, such as the call rates and phone numbers listed on our website. if you are a VAT-registered business within the EU (other than the Republic of Ireland) then you will not be charged VAT as long as you provided us with a valid VAT registration number during sign-up. If you are resident outside the EU then you will not be charged VAT. All other persons are liable to pay VAT at the standard Irish rate of 23%. Irish businesses which are registered for VAT will be entitled to re-claim the VAT paid.
- You will then be taken to the Paypal server. On the right-hand side you can choose to pay either by using your Paypal account or, if you do not have a Paypal account, by using your debit or credit card. Simply choose your preferred option and follow the on-screen instructions. When you are finished, please wait for the funds to be transferred to your Pro-Talk account. This is usually instant but can take up to 15 minutes.
- Please note that Paypal charges a fee for its services which it deducts from the amount of your top-up. The credit which actually appears in your will include the amount of this deduction. At present, Paypal charges a fee of €0.35 + 3.4% of the top-up amount.

Obtaining your SIP Username and Password
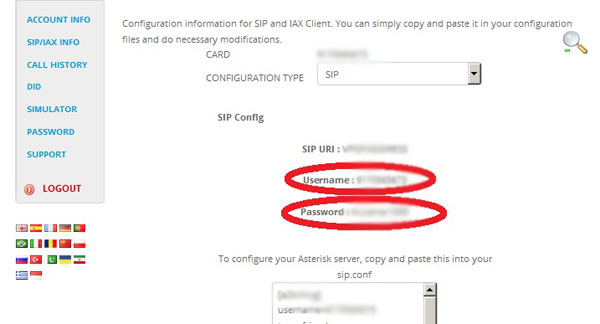
- Every Pro-Talk account will have two sets of usernames and passwords. The first set is the one which you use to log into your web account i.e. to check your call history, top up etc. The second set is referred to as the "SIP account" and is used for the purposes of making and receiving calls on a remote device such as a smartphone, PC, tablet etc. When you try to set up your account on such devices, you will be asked to enter a username and password. You will need to enter your SIP account details. You can find them as follows.
- Log into your Pro-Talk account.
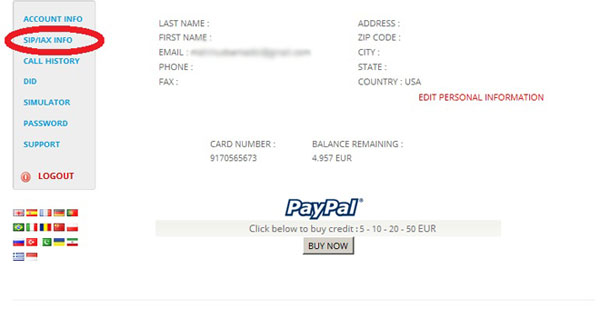
- On the left-hand side select "SIP/IAX INFO". You will then see a page with your "URI", "Username" and "Password". Please take a note of the Username and Password. These are used for logging into your SIP account for making and receiving calls., Unlike your web password, the SIP password cannot be changed by you. However, you may contact us should you wish to change it.
Checking your call history
- One of the great advantages of your Pro-Talk account is that you can easily check your call history from your account. In this way, unlike traditional calling cards, you will never feel short-changed or receive fewer minutes for your money than you thought you were getting. We recommend you regularly check your call history.
- Log into your account.
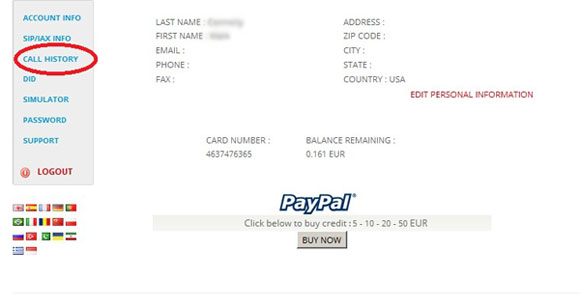
- From the left-hand menu choose "Call History".
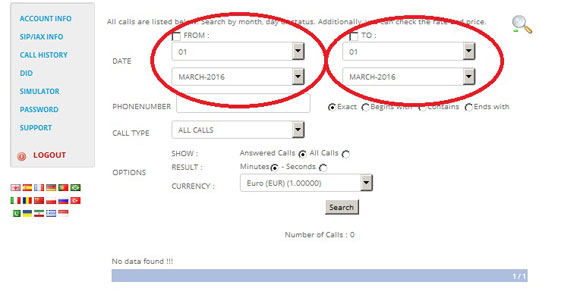
- Here you will see a list of options. The one you will need the most is the first one, "Date". This allows you to specify a "Start" date and an "End" date and allows you to see details about all calls made in that period.
- Place a tick in the boxes beside "From" and "To" and then specify the "From" date and the "To" date for which you would like call information. Click "Search" at the bottom of the table. You will then be presented with all calls made between those dates, including the destination dialled, the duration of the call, the "per minute" cost and the total cost of the call.
Finding out the cost of calls before making them
- Very often, traditional phone companies will advertise that certain calls, for example lanline calls within the country, cost X amount per minute. But you need to read the fine print to discover that some landline calls in the country are exempted and you end up paying more than you thought. You no longer need to worry about this thanks to the "Simulator" feature on your Pro-Talk account. This will tell you the exact cost of making calls to specified numbers.
- Log into your Pro-Talk account.
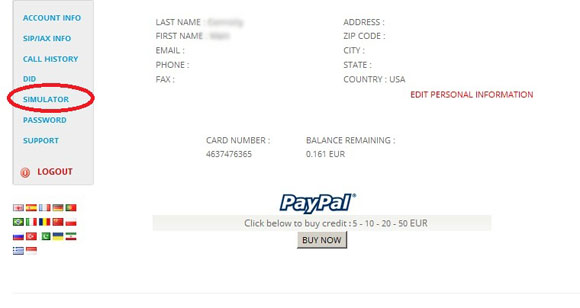
- Select "Simulator" from the left-hand menu.
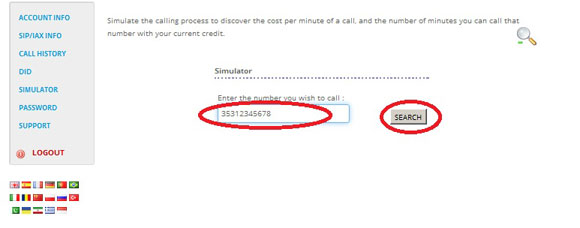
- On the simulator page, enter the phone number you wish to dial. Make sure to enter it in its international format, for example beginning with "00" if applicable.
- Click "Search".
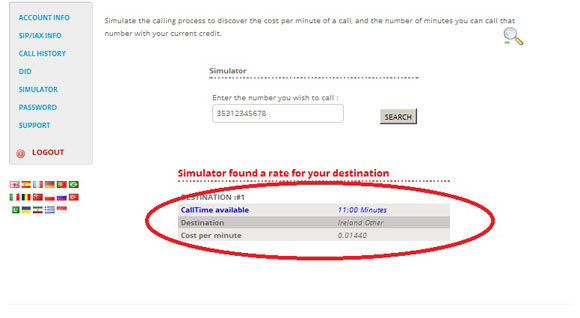
- You will then see information about the "per minute" cost of the call, the destination in question and the maximum number of minutes you can call that number with your current account balance. In the screenshot, you will notice that a landline phone call to Ireland costs 1.44 cent/minute and my current balance allows me to make a call of no more than 11 minutes to that number.
Opening Support Tickets
- Should you have any questions or need help with your account or products, we are always happy to assist. You can simply send an email to support@pro-talk.net with as much information about the issue as possible. Please make sure to include your account number in the e-mail and always send e-mails from the address which you provided to us on signing up.
- As well as e-mail support, we also offer a "Ticketing" facility as part of your account. Using this, you can open a "Ticket", which is basically a request for assistance, and we will reply to you as soon as possible. In order to use this facility, follow these instructions.
- Log into your account.
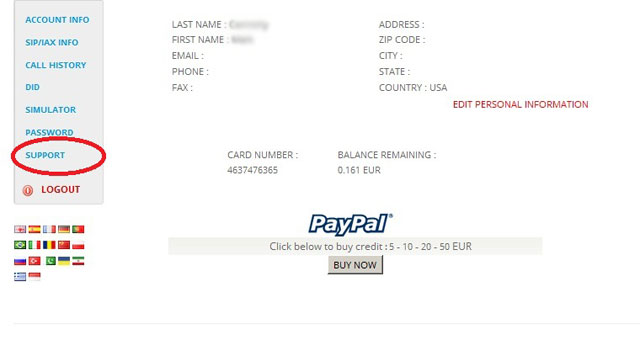
- Select "Support" from the left-hand menu.
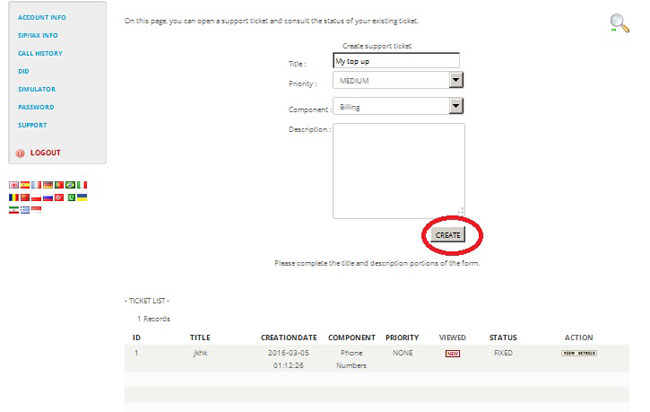
- You will then see a number of boxes which you will need to fill in. The boxes are designed to allow us to quickly and efficiently deal with your problem or question. The following is an explanation of each box:
- Title: Give your Ticket a Title, for example "Help with my UK Freephone number"
- Priority: This determines how urgent your query is. Please do not select "High" priority unless absolutely necessary. Don't worry, we will still try and deal with your problem as soon as possible.
- Component: These are categories into which your query can best be placed. Select "Other" if it does not fall under any of the other headings.
- Description: This is the most important part of the Ticket. Here you need to describe exactly what the issue is. Please make sure to provide as much detail as possible.
- Select "Create" once you have completed each of these boxes. The Ticket is then created and it will appear at the bottom of the screen. You can return to this page at any time to create new tickets and check the status of existing tickets. When you receive a reply to a Ticket, this will appear in the Ticket's status and you can read the reply by clicking on that Ticket from this page.
